
Choosing the right independent living community for a parent or loved one is one of the most consequential decisions a family can make, and most people start with no real roadmap. The independent living selection process involves far more than picking a place with nice amenities and a convenient location. It requires honest conversations about daily routines, health trajectories, financial realities, and what genuinely makes a person feel at home. This guide walks you through every critical phase, from eligibility criteria to move-in day, so you can make that decision with confidence instead of guesswork.
Table of Contents
- Key takeaways
- Understanding the independent living selection process
- The timeline for choosing independent living
- Evaluating and comparing communities
- Navigating the application and assessment process
- Getting ready for move-in day
- My honest take on the selection process
- Ready to start your search?
- FAQ
Key takeaways
| Point | Details |
|---|---|
| Start searching early | Beginning the search 12 to 18 months ahead gives families time to research, tour, and plan without rushed decisions. |
| Fit is more than amenities | Match the community to actual daily habits and routines, not just a brochure’s highlight reel. |
| Assessment is collaborative | The qualification process is a needs-matching conversation, not a pass-or-fail medical exam. |
| Use a comparison framework | Rank non-negotiable criteria before touring so emotions do not override practical judgment. |
| Waitlists require active management | Subsidized housing programs often use lotteries and waitlists that require regular status updates to maintain your spot. |
Understanding the independent living selection process
Before you can choose the right community, you need to understand what the selection process actually evaluates. Many families assume there is a formal test or strict medical threshold a senior must clear. That is largely a misconception. The qualification process is collaborative, designed to assess how well a community can support a person’s current and anticipated daily routines, not to screen people out.
Communities do conduct health and functional assessments, but the goal is personalization. Staff want to understand how independent the individual is today, what safety considerations exist, and how those needs might evolve. That information shapes the support plan, not a rejection letter. To understand more about how senior living qualification works, it helps to separate eligibility from admission compatibility.
Here is what the criteria for independent living typically cover:
- Functional independence: The person can manage most activities of daily living without hands-on support.
- Safety awareness: No active behavioral patterns that put the individual or others at risk.
- Lifestyle fit: The community’s programming and environment align with the person’s interests and social preferences.
- Health trajectory: Some communities assess whether anticipated care needs fall within their service scope.
- Financial qualification: Market-rate communities confirm affordability; subsidized programs like HUD Section 202 apply income thresholds for applicants aged 62 and older.
“Admission is less about touring and depositing and more about whether the community can safely support current and anticipated daily routines.” — Who Qualifies for an Assisted Living Community?
Independent housing options span a wide range, from active adult communities with full lifestyle programming to more modest apartment-style buildings with minimal services. Understanding this spectrum before you begin touring prevents wasted time and unrealistic comparisons.
The timeline for choosing independent living
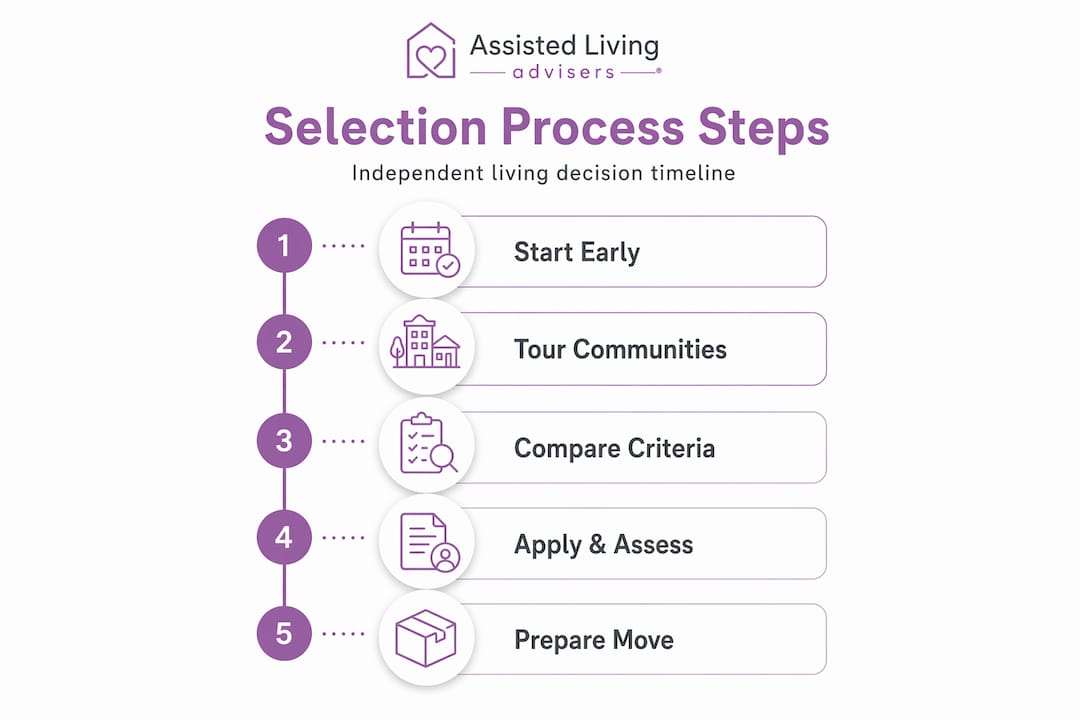
One of the most reliable ways to reduce stress throughout this process is to start earlier than feels necessary. Experts recommend establishing a road map 12 to 18 months before an intended move-in date. That window feels long until you are in it.
Here is a practical timeline to work from:
- 12 to 18 months out: Have an honest family conversation about the senior’s goals, lifestyle preferences, and financial picture. Identify must-haves versus nice-to-haves. Start light research on communities in target geographic areas.
- 9 to 12 months out: Schedule tours at three to five communities. Attend organized events if communities allow prospective residents to visit during activities. This reveals far more about the actual culture than a formal walkthrough.
- 6 to 9 months out: Request floor plans early from your top choices. Floor plans are more than a courtesy. They allow accurate rightsizing decisions so furniture fits the space and move-in day does not become a crisis. Engage a senior move manager or professional organizer if the current home has decades of accumulated belongings.
- 3 to 6 months out: Submit applications to your top one or two communities. If considering subsidized programs, apply concurrently since waitlists can stretch for years.
- 1 to 3 months out: Confirm all paperwork, complete any required health assessments, and finalize the move date. Handle address change notifications and document organization well ahead of the move.
Pro Tip: Do not wait until a health event forces the decision. Families who begin this process reactively, after a fall or hospitalization, have fewer good options and far less time to evaluate them properly.
Evaluating and comparing communities
This phase is where the independent living evaluation process either gets disciplined or falls apart. Touring communities is exciting, and marketing teams are skilled at presenting their best face. Your job is to verify what you see.

Before any tour, write down your top five non-negotiable criteria. These might be on-site transportation, a strong fitness program, pet accommodations, proximity to family, or a specific fee structure. Knowing your priorities in advance keeps you grounded when a community has a stunning dining room but no transportation options.
When you are comparing independent housing options side by side, use a table like this to organize your findings:
| Criteria | Community A | Community B | Community C |
|---|---|---|---|
| Monthly base fee | Confirm in writing | Confirm in writing | Confirm in writing |
| Transportation included | Yes/No | Yes/No | Yes/No |
| Pet policy | Details | Details | Details |
| On-site wellness programs | Specific classes | Specific classes | Specific classes |
| Social activity calendar | Frequency | Frequency | Frequency |
| Healthcare access | On-site nurse/referral | On-site nurse/referral | On-site nurse/referral |
| Fee transparency | All-inclusive or itemized | All-inclusive or itemized | All-inclusive or itemized |
An independent living checklist that covers these areas keeps you from relying on memory across multiple tours. According to what residents actually use, transportation, wellness classes, and social activities matter far more than lobby aesthetics in daily satisfaction.
A few things to confirm beyond the tour:
- Ask specifically what is included in the base fee versus what triggers an add-on charge.
- Request a copy of the current resident activity calendar, not a sample one.
- Talk to current residents without staff present if possible. A five-minute conversation with someone who lives there tells you more than an hour with a sales director.
- Confirm the community’s policy when care needs increase. Some communities can add services; others require residents to transfer.
When you learn to compare senior communities using concrete criteria rather than first impressions, the right choice becomes much more obvious.
Navigating the application and assessment process
Most families treat the application as an administrative formality. In reality, this is where the selection process gets decided. Health assessments, financial disclosures, and conversations with community staff all happen here, and how you prepare matters.
Approach every assessment conversation as a dialogue about what support looks like, not a performance. Communities use these conversations to confirm that their environment and services are the right fit, which protects the resident as much as it protects the community.
A few practical points for getting through this phase without unnecessary delays:
- Gather medical records, medication lists, and a summary of health history in advance. Many communities need these before finalizing admission.
- If applying to HUD Section 202 housing or other subsidized programs, understand that selection often happens by lottery or waitlist. Apply early, and apply to multiple programs simultaneously.
- Once on a waitlist, do not go silent. Many housing authorities require quarterly status updates to keep your place. Missing a check-in can remove you from the list entirely.
- Schedule tours and follow-up interviews promptly. Communities notice when families are engaged and responsive, and that matters during the selection conversation.
- Include key family decision-makers in the process without overwhelming the senior. This is ultimately about the person moving in. Their voice should lead.
Pro Tip: If a community has a waitlist for your preferred unit type, ask to be added even before you are fully decided. You can always decline an offer, but you cannot speed up a waitlist.
Common mistakes that derail the process include submitting incomplete paperwork, failing to follow up after tours, and waiting for a health event to force urgency. The families who move through this smoothly start early and stay organized.
Getting ready for move-in day
Once a community is selected and the move date is set, the focus shifts to logistics. This phase is more manageable than most families expect if you have done the rightsizing work in earlier months.
Here is a practical move-in sequence that reduces the chaos:
- Confirm what the community provides. Many independent living communities furnish common areas and sometimes kitchenettes. Know exactly what the room or apartment includes so you do not bring duplicates.
- Pack an essentials box separately. This box travels in the car, not the moving truck. It holds medications, important documents, phone chargers, a change of clothes, and anything needed for the first 24 hours. Label it clearly and keep it accessible.
- Label everything going into the community. Furniture, boxes, and personal items should all be clearly marked with the resident’s name and unit number.
- Notify address changes before move-in. Update the postal service, Social Security, Medicare, financial institutions, and any subscriptions at least two weeks before the move date.
- Plan the first week intentionally. Attend at least one or two organized activities in the first week, even if the resident is tired or hesitant. Early engagement dramatically affects how quickly people feel at home.
The emotional adjustment after moving in is real and often underestimated. Give it 30 to 90 days before drawing conclusions. Most residents who engage with the community’s social programming report a strong sense of belonging within the first few months. For additional guidance on the transition, reviewing how to simplify the move can help set realistic expectations.
My honest take on the selection process
I have worked with enough families navigating this process to know where things consistently go sideways. The number one problem is not a lack of information. It is timing. Families wait until there is a health crisis, and then they are choosing from whatever is available rather than what is actually right.
The second thing I have learned is that lifestyle fit matters more than any amenity list. I have seen seniors thrive in modest communities with strong social programs and wither in beautiful facilities where they felt no connection to other residents. The brochure does not tell you that. The activity calendar and a 10-minute conversation with a current resident does.
What I tell families every time: reframe the assessment process. It is not an interview where your parent needs to perform. It is a conversation where the community is trying to figure out if they can genuinely serve this person well. That shift in framing changes everything. It turns a stressful evaluation into a productive dialogue.
The families I have seen do this best treat the independent living selection process as a project with a clear start date, a realistic timeline, and defined criteria. They do not wait for certainty before starting. They start to create certainty.
— Eric
Ready to start your search?
If you are beginning to think seriously about independent living options for a parent or loved one, you do not have to figure it out alone. Assistedlivingadvisers provides free, personalized guidance to families throughout the New York, New Jersey, and Connecticut tri-state area.

The advisers at Assistedlivingadvisers help you assess needs, identify well-matched communities, and coordinate tours, all without any cost to your family. Whether you are just starting to explore independent living communities or ready to narrow your choices, working with an experienced local adviser means you get vetted recommendations built around what actually matters to your family. Visit the independent living resource page or contact Assistedlivingadvisers directly to schedule your free consultation.
FAQ
How early should you start the independent living selection process?
Most eldercare experts recommend starting 12 to 18 months before your target move-in date. This gives families enough time to research communities, tour options, rightsize belongings, and complete paperwork without pressure.
What criteria do independent living communities use to qualify residents?
Communities assess functional independence, safety awareness, lifestyle fit, and financial qualification. The process is a collaborative conversation, not a formal medical exam, and aims to confirm that the community can genuinely meet the individual’s needs.
How do you compare independent living communities effectively?
Use a structured checklist that covers base fees, what is included, transportation, wellness programs, pet policies, and social activities. Confirm details in writing and talk to current residents to verify what residents actually experience beyond the sales tour.
What happens if the community you want has a waitlist?
Get on the waitlist as early as possible, even before you are fully committed. For subsidized programs, maintain regular contact with the housing authority since missing quarterly check-ins can remove you from the list. Apply to multiple programs simultaneously to avoid relying on a single option.
How long does it take to adjust after moving into independent living?
Most residents need 30 to 90 days to feel settled. Active engagement with community programming in the first week significantly accelerates that adjustment. Families should plan for a transitional period and resist drawing conclusions about fit in the first few weeks.
Recommended
Let’s Work Together To Find The Ideal Senior Living Community For Your Loved One.
Assisted Living Advisers is a FREE, personalized service offering expert guidance in determining the ideal community for your loved one based on physical needs, location preferences and finances.